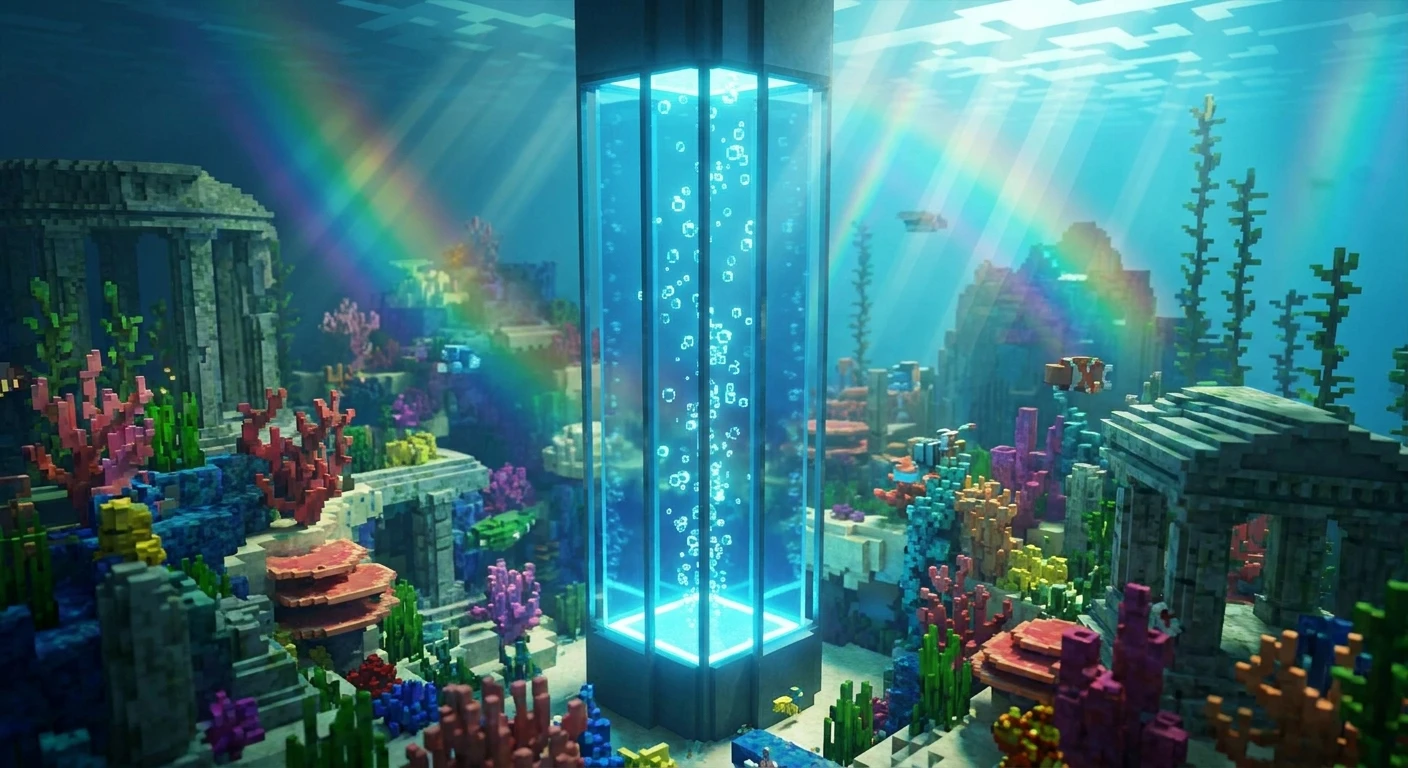
Mastering How To Make Water Elevator In Minecraft
Figuring out exactly how to make water elevator in minecraft is an absolute game-changer for anyone tired of slowly climbing endless ladders or running up spiral staircases. When you build massive underground bunkers or towering sky fortresses, vertical transport becomes your biggest logistical hurdle. You need a system that moves you, your friends, and your items from bedrock to the build limit in mere seconds. This is where the physics of soul sand and magma blocks come into play. Vertical travel doesn’t have to be a tedious chore; by harnessing specific block interactions, you can create high-speed transport systems that look amazing and save you massive amounts of time.
Listen, nobody wants to hold down the jump button for two minutes straight just to reach a storage room. The beauty of the bubble column system is its sheer efficiency and low resource cost. You do not need complex redstone circuits, expensive powered rails, or hard-to-find slime blocks. As long as you have a few basic materials from the Nether and the ocean, you can construct a foolproof transportation network. Whether you are building an underwater dome or a massive skyscraper, this method remains the undisputed king of vertical movement.
Read also: Guide: how to make a water elevator in minecraft; Guide: How to Make Paper in Minecraft.
Now, let us get into the core mechanics of why this system dominates the building meta.
The Ultimate Vertical Transport Choice
Choosing the right transport method dictates the entire flow of your base. When comparing different options, bubble columns consistently win on speed, cost, and reliability. Here is exactly why you need to upgrade your infrastructure.
| Transport Method | Vertical Speed | Resource Cost |
|---|---|---|
| Bubble Column | Very Fast (approx. 11 blocks/sec) | Low (Glass, Kelp, Soul Sand/Magma) |
| Ladders / Scaffolding | Slow (approx. 3 blocks/sec) | Very Low (Wood, Bamboo) |
| Minecart Shaft | Fast (approx. 8 blocks/sec) | High (Iron, Gold, Redstone) |
The value proposition here is incredible. You invest a tiny amount of time upfront for a permanent, high-speed solution. Consider two prime examples of its utility. First, imagine you are mining near the Deep Dark biome and trigger a Sculk Shrieker; an upward bubble column offers an instant, panic-free escape route to the surface before the Warden fully spawns. Second, if you run an automated mob farm high in the sky, a dual-tube system allows you to effortlessly glide up to your AFK spot and get sucked right back down to your storage system without taking fall damage.
To successfully build this setup, you must understand the three non-negotiable components of the system:
- An Enclosed Shaft: The liquid must be completely contained on all four sides so it does not spill and ruin your surrounding base architecture.
- Pure Source Blocks: Every single block of liquid inside the shaft must be a dedicated source block, otherwise the bubbles will stop forming at the broken link.
- The Propellant Base: You need Soul Sand to generate upward thrust, and a Magma Block to create a downward vortex pull.
Origins of Vertical Transport
In the early days of the game, players relied on incredibly janky methods to move vertically. You might remember the old alternating sign-and-water trick, where players would constantly swim up one block, gasp for air in the sign space, and swim up the next. People even used glitchy boat elevators that shot you up through solid blocks by exploiting collision detection mechanics. It was messy, unreliable, and often resulted in sudden character death if the server lagged.
The Aquatic Update Evolution
Everything changed with the release of the 1.13 Update Aquatic. This massive overhaul introduced completely new fluid dynamics and the concept of bubble columns. Suddenly, the strange interaction between magma and soul sand in the oceans could be weaponized by players for fast transport. It completely revolutionized base design, rendering massive spiral staircases and long ladder shafts obsolete overnight.
The Modern State of Bubble Columns
By the time we hit the massive building trends of 2026, the bubble column has become a standardized piece of infrastructure. Modders and vanilla players alike rely on it. It is so ingrained in the community’s building vocabulary that practically every multiplayer server spawn utilizes them for safe, foolproof navigation between shopping districts and community hubs.
Fluid Dynamics in Block Form
To truly master this build, you need a brief understanding of how fluid physics are calculated in the game engine. There is a massive distinction between flowing water and a source block. When you dump a bucket at the top of a tower, you create one source block at the top, and the rest is just “flowing” block states extending downward. The bubble mechanic is hardcoded to only generate inside consecutive source blocks. If even one block in your tube is merely flowing, the bubble column completely severs at that exact coordinate.
The Kelp Conversion Technique
Manually placing a bucket on every single level of a massive 100-block tall tube is terribly inefficient. This is where kelp enters the equation as your greatest technical tool. When kelp grows or is placed into flowing liquid, it forces the game engine to recalculate that block state, instantly converting it into a full source block.
- Oxygen Regeneration: Standing inside an upward bubble column completely restores your breath meter, meaning you can never drown while traveling up.
- Entity Drag: The physics do not just apply to players; dropped items, hostile mobs, and even tridents are violently pushed or pulled by the current.
- Damage Mechanics: The downward pull of magma will hurt you if you stand on it, but crouching entirely negates the burn damage.
Step 1: Gather Your Building Materials
Before you begin construction, make sure your inventory is prepped. You will need one bucket of water, a stack of kelp, a stack of building blocks (glass is highly recommended for visibility), a few wooden signs, one piece of Soul Sand, and one Magma Block. Having everything ready prevents awkward trips back to your chests.
Step 2: Construct the Outer Tube
Decide where your transport hub will be and build a hollow tube. It needs to be a 1×1 empty space surrounded by solid blocks on all four sides. Build this tube all the way from your starting floor to your exact destination level. Glass is the most popular choice because it lets you see the surrounding base as you zip past.
Step 3: Place the Entryway Signs
At the bottom of your tube, break a two-block high opening so you can actually walk into the shaft. To prevent the liquid from immediately spilling out and destroying your carpets or redstone, place two wooden signs inside the entryway. Signs do not have a full hitbox, allowing you to walk right through them while completely blocking fluid physics.
Step 4: Flood the Shaft from the Top
Climb to the very top of your newly built tube. Take your single water bucket and place it exactly on the top block inside the hollow space. Gravity will pull the flowing liquid all the way down to the bottom, stopping perfectly behind the signs you placed. Do not jump down yet; let it flow entirely to the bottom level.
Step 5: Plant Kelp from the Bottom Up
Head back down to the entryway. Walk through the signs into the flowing liquid. Look straight down at the floor block of the tube and plant your first piece of kelp. Continue placing kelp on top of itself, building a solid pillar of vegetation all the way to the top of the tube. This action is secretly turning every flowing block into a permanent source block.
Step 6: Break the Kelp to Create Source Blocks
Once the kelp reaches the very top, travel back down to the bottom. Break the very lowest piece of kelp. The entire plant will instantly shatter and float to the top, but the game engine will leave behind a perfect, unbroken column of source blocks. Your tube is now mathematically ready to generate bubbles.
Step 7: Swap the Base for Soul Sand or Magma
For the final activation step, quickly dig out the standard floor block sitting directly beneath the liquid at the bottom of the tube. Replace it instantly with Soul Sand to create an upward elevator, or a Magma Block for a downward elevator. You will immediately see white bubbles rushing through the column. Step in and enjoy the ride!
Myths & Reality
Myth: You need to place water source blocks on every single level manually with dozens of buckets.
Reality: The kelp technique instantly converts flowing liquid into source blocks, meaning you only ever need a single bucket at the very top of the shaft.
Myth: Bubble columns will drown you if they are too high because you cannot swim fast enough.
Reality: The bubbles actually restore your oxygen meter continuously. You could go AFK in an upward soul sand column forever without taking a single heart of drowning damage.
Myth: Hostile mobs and dropped items cannot use these systems.
Reality: Items, zombies, skeletons, and essentially all entities are affected by the bubble push and pull physics, making this mechanic absolutely vital for automated farm sorting systems.
Myth: Any type of Nether sand works for the upward push.
Reality: It must specifically be Soul Sand. Soul Soil looks similar but lacks the coded properties to generate bubble columns.
Can I use ice to make water elevators?
Yes, you can place a pillar of ice blocks and then break them, which leaves source blocks behind, but this requires a Silk Touch pickaxe and is much slower than the kelp method.
Does soul soil work for elevators?
No, Soul Soil does not generate any bubbles. You must find traditional Soul Sand, typically found in the Soul Sand Valley biome or lower Nether wastes.
Why is my water elevator not working?
If there are no bubbles, you do not have a solid line of source blocks. You likely missed a spot with the kelp, or you placed the Soul Sand under a flowing block instead of a source block.
Can villager mobs use the elevator?
Absolutely. Pushing a villager into the column is one of the easiest ways to transport them vertically into trading halls without dealing with minecart tracks.
How do you go down fast?
Use a Magma Block at the base of the tube instead of Soul Sand. It creates a whirlpool effect that aggressively pulls you downward. Just remember to crouch when you land so you do not take burn damage.
Do I need doors or signs at the entrance?
You need something with a partial hitbox. Signs, open fence gates, or standard wooden doors all work perfectly to hold the liquid back while allowing you to walk through.
What is the maximum height for an elevator?
There is no limit other than the world build limit. You can safely run a tube from bedrock all the way up to height limit 320 in a single, continuous stream.
Now that you know the ins and outs of this mechanic, you are fully equipped to revolutionize your base. Vertical transport is no longer a bottleneck for your creativity. So grab your buckets, harvest some kelp, and start building your ultimate base today! Safe travels on your new high-speed transit system!





Leave a Reply