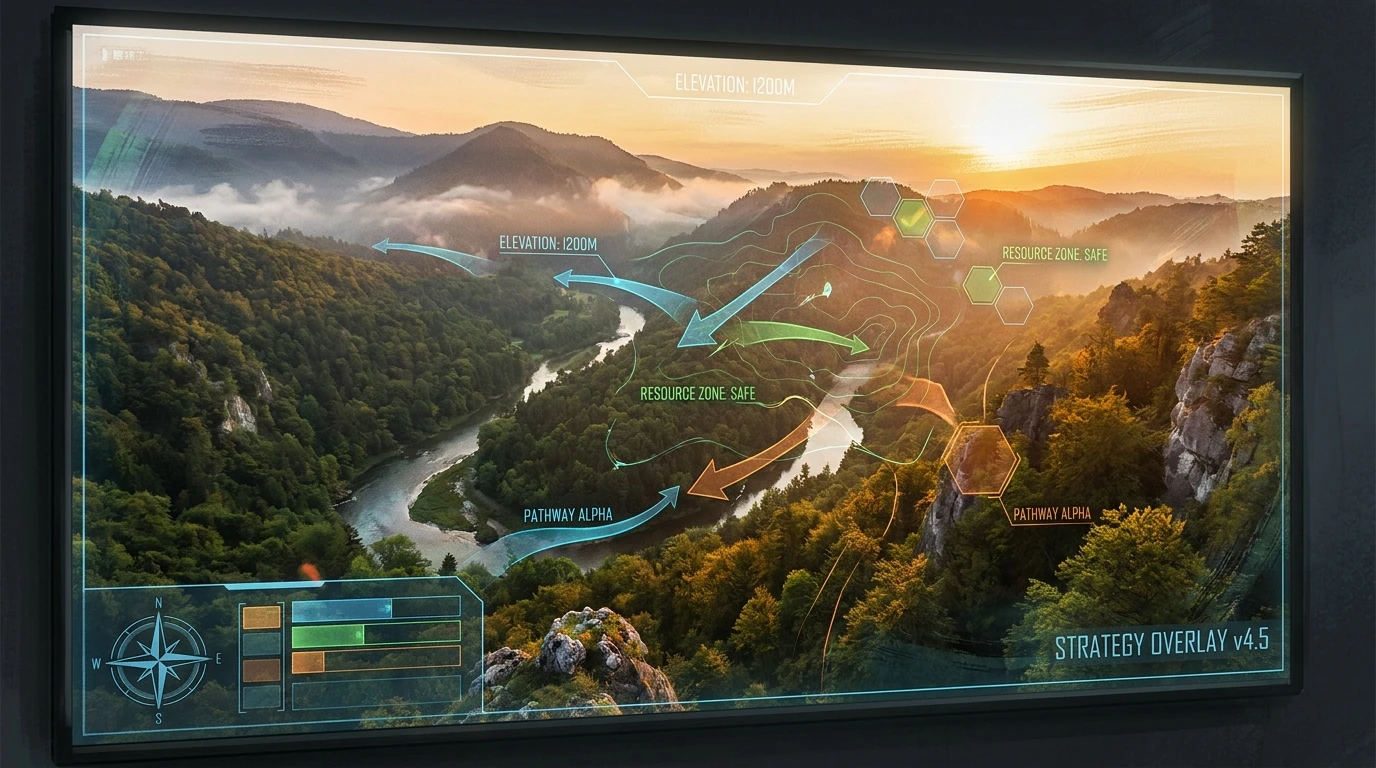
Valley Combat Guide: Mastering Tactical Terrain
Securing the high ground and managing critical chokepoints are the foundations of any reliable valley combat guide. When you find yourself navigating a tactical simulation, map awareness dictates the outcome of the engagement. Valleys present a unique geographical challenge. They naturally funnel movement, limit peripheral visibility, and create distinct advantages for anyone holding the elevated ridges. Understanding how to exploit these terrain features is non-negotiable for consistent success.
Listen, approaching a depression in the terrain without a concrete plan is a fast track to being pinned down. The geometry of a valley forces a confrontation between the mobility of the low ground and the visibility of the high ground. A proper tactical approach requires mapping out the sightlines before committing to a path. This means evaluating the angle of the slopes, the density of available cover at the base, and the potential exit routes if the position is compromised. We are going to break down the exact mechanics, positioning strategies, and movement rotations necessary to dominate this specific type of map topology. By treating the terrain as an active participant in your strategy, you gain a massive advantage over opponents who merely react to their surroundings.
Read also: Secrets of the Shrine of Ash: A Complete Guide; How to Beat orin bg3 Easily.
Core Strategies for Terrain Dominance
Executing a flawless maneuver through a restricted geographical bottleneck requires precise coordination and a deep understanding of spatial advantages. The primary benefit of mastering these environments is total control over the pace of the engagement. When you dictate where and how the opposition can move, you actively drain their resources while preserving your own.
Consider the value proposition of holding the dominant ridge. First, example one: avoiding the fatal funnel. By controlling the flanks of the valley, you prevent opponents from using the natural walls to mask their approach, forcing them to move through open ground. Example two: logistical denial. If you lock down the primary pass, you control the flow of resources, reinforcements, and objectives, leaving the opposing force starved for options and space.
| Terrain Zone | Tactical Advantage | Primary Vulnerability |
|---|---|---|
| Ridge Crest | Maximum visibility and sweeping line of sight over the area. | Silhouetting against the sky, exposing position to distant flanks. |
| Valley Floor | Fastest linear movement and natural path for vehicles. | Zero elevation advantage; highly susceptible to plunging crossfire. |
| Sloped Terraces | Excellent lateral cover and unpredictable movement options. | Severely restricted mobility and high risk of falling damage or sliding. |
To establish absolute control over a valley environment, you must adhere strictly to a sequenced approach. Skipping these phases usually results in immediate positional collapse:
- Establish Perimeter Overwatch: Before moving any assets into the depression, secure a minimum of two elevated vantage points that offer intersecting fields of view. This guarantees that any movement below is immediately registered.
- Secure the Chokepoints: Identify the narrowest sections of the valley where movement is naturally restricted. These are the zones where you plant your heavy defenses or plan your primary ambushes.
- Manage the Low Ground Rotation: If you must cross the valley floor, do it utilizing the terrain masking technique. Move from cover to cover, utilizing large rocks, vegetation, and natural dips in the earth to break the line of sight from the ridges above.
- Maintain Flank Security: A valley is essentially a corridor. You must constantly monitor the entrances and exits of this corridor to prevent a coordinated pincer movement from trapping your forces inside.
Origins of Valley Tactics
The concept of utilizing terrain depressions and funnels for strategic advantage is as old as strategy itself. To understand modern tactical mechanics, we need to look at how these environments have been modeled and utilized historically.
Historical Precedents
Long before digital simulations, ancient military scholars like Sun Tzu extensively documented the dangers and opportunities of navigating enclosed terrain. The “fatal terrain” principle warned against entering areas where the only options were to fight desperately or perish. These historical texts formed the baseline for how competitive strategy games eventually designed their maps, prioritizing the high ground and creating natural bottlenecks that forced decisive encounters.
Evolution of Terrain Strategy
In early real-time strategy (RTS) titles like StarCraft and Age of Empires, valleys were represented simply as impassable walls creating narrow paths. The strategy was entirely two-dimensional: build a wall at the chokepoint and mass your units behind it. However, as processing power increased and game engines evolved to support full 3D environments, the Y-axis became critical. Titles like Arma and the Battlefield series introduced true topographical maps where a valley was no longer just a wall, but a complex, sloped environment where physics, bullet drop, and line of sight calculation completely changed the tactical paradigm.
The Modern State of Map Control
Today, valley combat in tactical simulations involves dynamic variables. Destructible environments mean that the cover you rely on at the valley floor can be obliterated by plunging fire from the ridges. Dynamic weather systems fill valleys with fog, completely inverting the traditional advantage of the high ground by blinding the snipers and giving the advantage to close-quarters forces moving below. The modern strategist must account for these shifting variables, recognizing that terrain control is fluid rather than static.
Scientific Geometry of the Crossfire
Effective map control isn’t just about intuition; it is grounded in the hard science of geometry and physics engine mechanics. Understanding the underlying technology and spatial mathematics provides a massive edge.
Topographical Data Interpretation
When analyzing a valley, you are essentially calculating elevation deltas and sightlines. The term “defilade” refers to positioning yourself behind a terrain feature so that you are protected from direct fire. “Enfilade” occurs when you direct your focus down the longest axis of a valley, maximizing the amount of time an opponent remains in your line of sight. By calculating the angle of declination from a ridge, you can determine exactly how much of the valley floor is visible and where the blind spots—often called “dead space”—exist directly below the cliff edge.
Physics Engine Realities
Modern tactical engines simulate environmental factors with extreme precision. You must factor in the following scientific and technical realities:
- Sound Propagation: Valleys act as natural acoustic funnels. Sounds generated on the valley floor often echo off the walls, making it difficult to pinpoint the exact origin, while sounds from the ridge carry far across the map.
- Ballistic Trajectory: Firing downward into a valley alters the perceived bullet drop. Because gravity acts on the horizontal distance traveled rather than the hypotenuse of the shot, you must aim slightly lower than you would for a flat target at the same distance.
- Render Distance Restrictions: Game engines often utilize fog or rendering limits to save processing power. A ridge might provide a theoretical view of the entire valley, but engine limitations might obscure distant movements, requiring forward spotters.
- Terrain Masking Limits: Vegetation rendering varies by distance. A bush that provides perfect visual concealment for a player on the valley floor might not render for an observer on a distant ridge, leaving the player completely exposed against a bare texture.
Step-by-Step Execution Plan
To successfully navigate, secure, and hold a valley environment, you need a rigid, reproducible methodology. Follow this sequential plan to guarantee positional dominance.
Step 1: High Altitude Reconnaissance
Never enter the valley blind. Use drones, scout units, or optical magnification to scan the opposing ridges and the valley floor. Identify primary cover points and note any movement patterns. Your goal is to map the “dead space” where ridge observers cannot see you.
Step 2: Securing the Overlook
Dispatch a small, highly mobile element to take control of one side of the elevated ridge. They do not need to engage immediately; their job is to provide continuous telemetry and act as a deterrent against flanking maneuvers.
Step 3: Perimeter Sweeping
With eyes above, send a secondary element along the terraced edges of the valley. Avoid the very bottom. Move along the slopes to maintain partial elevation and better angles while clearing out any forward operating outposts.
Step 4: Chokepoint Reinforcement
Once the perimeter is swept, identify the narrowest exit or entrance to the valley. Move defensive assets into this position. Establish overlapping fields of focus so that anyone attempting to push through the bottleneck faces multiple angles of resistance simultaneously.
Step 5: Establishing the Crossfire
Coordinate your ridge element and your chokepoint element to create an L-shaped ambush. The ridge provides plunging suppression, while the chokepoint element halts forward momentum. This geometric setup traps targets in a kill zone with no viable cover.
Step 6: Decoy Deployment and Misdirection
If you need to draw opponents into the valley, generate noise or visible activity near the center of the depression. Make the opposition believe they have caught you in an exposed position, baiting them to rush the ridges or push the chokepoint aggressively into your prepared crossfire.
Step 7: Final Securing and Extraction Routing
Once the engagement is resolved, do not remain static. Valleys easily become traps if a third party arrives. Quickly secure any remaining objectives, consolidate your resources, and use the secured chokepoint to rotate out of the depression into more defensible, open terrain.
Myths and Reality in Tactical Topography
There are several pervasive misunderstandings about terrain management that lead to rapid defeats. Let us address the most common ones.
Myth: The absolute highest peak is always the best position.
Reality: The highest peak often silhouettes you against the skybox, making you instantly visible from every angle on the map. Mid-level slopes with natural rock cover frequently offer safer, more reliable sightlines without broadcasting your location.
Myth: Valleys are guaranteed death traps and should be avoided entirely.
Reality: While dangerous, valleys provide the fastest route between two objectives and offer complete concealment from peripheral map elements. Used correctly, they are excellent lanes for rapid, stealthy rotations.
Myth: Speed is the only thing that matters when crossing low ground.
Reality: Rushing blindly through a valley alerts every observer to your presence. Methodical movement from cover to cover, combined with smoke or suppressing fire, is far more effective than sheer sprinting speed.
Myth: Once you hold the chokepoint, the valley is safe.
Reality: A chokepoint only stops linear movement. If the opposition secures the ridges above you, your chokepoint becomes a static target for plunging attacks.
Frequently Asked Questions
How do I break a fortified valley chokepoint?
Do not attack it directly. You must flank via the elevated ridges to neutralize the defenders from above before pushing the main path.
What is the most common mistake made in valley environments?
Tunnel vision. Operators focus entirely on the path ahead and forget to constantly scan the elevated tree lines and rocky outcrops above them.
How useful is smoke concealment in a valley?
Extremely useful for breaking line of sight on the horizontal plane, but be aware that observers on high ridges can often see the exact edges of the smoke cloud and anticipate your exit trajectory.
Should vehicles be used on the valley floor?
Only if you have already secured the ridges. Vehicles in a valley are highly susceptible to top-down attacks and have very limited room to maneuver evasively.
What is terrain masking?
Terrain masking is the act of keeping a solid geological feature between you and the suspected location of an opponent, moving only when the terrain obscures their vision.
How do I locate concealed observers on a ridge?
Look for irregularities in the skyline, unnatural geometric shapes, and monitor the tree line for movement or muzzle flashes during the initial scouting phase.
What is an L-shaped ambush?
It is a tactical formation where two distinct elements form a right angle around a target area, preventing the target from finding cover that protects them from both angles simultaneously.
Navigating and holding these challenging topographical features requires patience, precision, and an unyielding commitment to spatial awareness. Use the strategies outlined here to dictate the terms of every engagement. Start analyzing the map geometry today, take control of the high ground, and secure your victory!




Leave a Reply