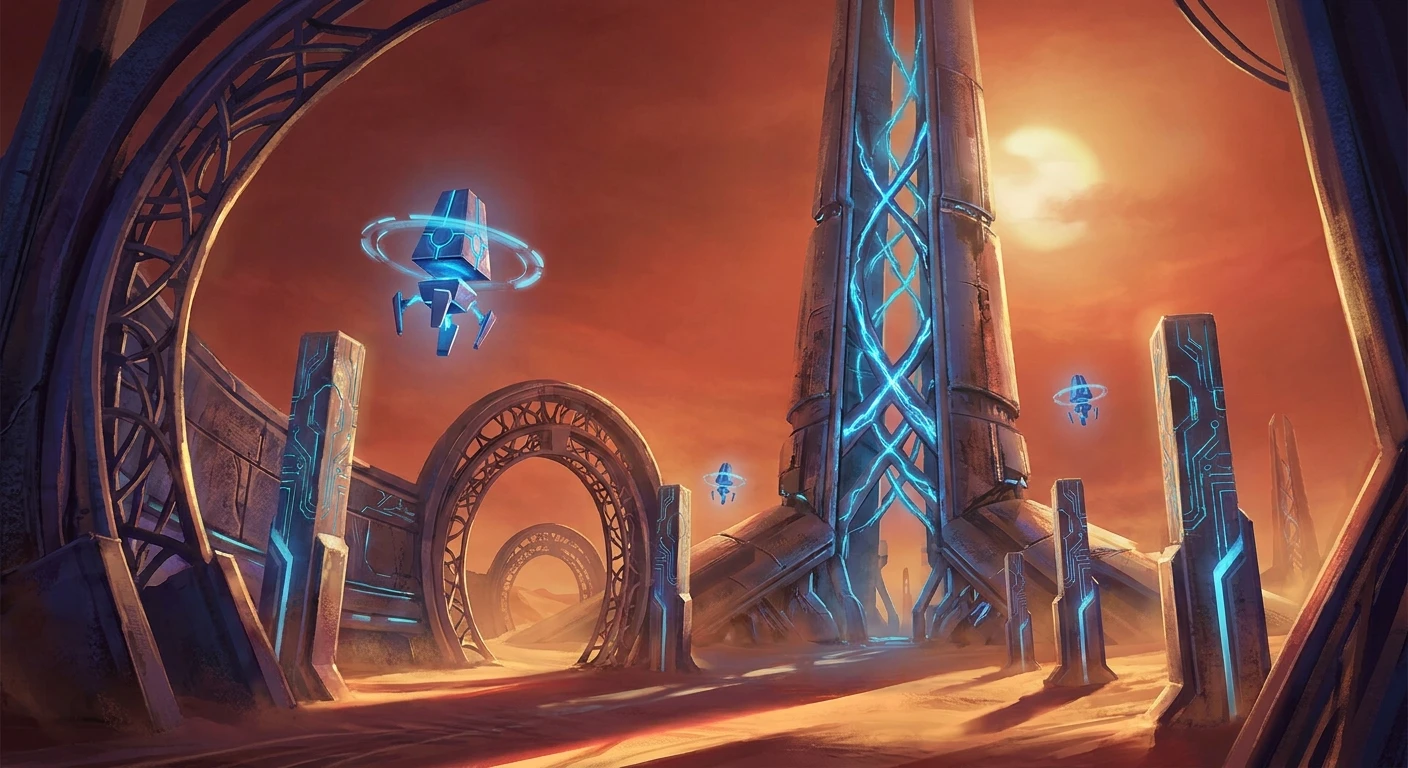
Mastering the Spire of the Watcher in Destiny 2
Surviving the Spire of the Watcher requires precise coordination, rapid movement, and a thorough understanding of the intricate electrical systems left behind by Clovis Bray. Located on the dusty, red surface of Mars, this Vex-infested Seraph facility challenges fireteams to navigate complex jumping puzzles and high-stakes boss arenas. Rather than relying purely on overwhelming firepower, success here hinges on mastering environmental mechanics under extreme pressure. You must connect the facility’s power grid while fending off endless swarms of Sol Divisive Vex who are actively trying to lock you out of the critical Pillory systems.
Tackling this endgame challenge offers some of the most sought-after rewards in the current sandbox. The facility is not just a dusty ruin; it is an active battleground where ancient warmind technology collides with time-traveling synthetic machines. Securing the perimeter and reactivating the submind Soteria demands a unique blend of agility, sustained damage output, and immediate situational awareness. By preparing your loadout meticulously and understanding the layout of every cable and node, you can ensure a smooth, efficient operation. The architecture of the bunker is unforgiving, but deciphering its logic unlocks pathways to massive armories and highly coveted tactical gear.
Read also: Secrets of the Shrine of Ash: A Complete Guide; Survive the blood stained shrine Today.
Core Mechanics, Loot, and Strategic Advantages
Mastering this dungeon brings substantial tactical advantages, primarily through the highly desirable Tex Mechanica armor sets and exclusive weaponry. The core mechanical loop revolves around the “Arctrician” buff. Defeating specific Minotaurs grants this buff, allowing you to shoot electrical nodes in a precise sequence to power up generators, open doors, and trigger boss vulnerability phases. The challenge lies in tracing these yellow wires across massive gaps, around pillars, and even underneath platforms while under heavy fire from Vex snipers and explosive Harpies. The value proposition here is immense: perfect execution leads to top-tier loot that dominates both PvE and PvP environments.
To highlight the progression and rewards, here is a breakdown of the primary engagements:
| Encounter Phase | Key Technical Mechanic | Notable Loot Opportunities |
|---|---|---|
| Ascending the Reactor Grid | Tracing sequential arc nodes across platforms | Tex Mechanica Arms/Legs, Long Arm Scout Rifle |
| Akelous, the Siren’s Current | Activating four fuel rods to expose central core | Tex Mechanica Chest, Terminus Horizon Machine Gun |
| Persys, Primordial Ruin | Isolating the boss in the reactor for critical purge | Tex Mechanica Class Item, Wilderflight Grenade Launcher |
Preparation is absolutely crucial before setting foot in the facility. Firing blindly will only waste ammunition and precious time. You must optimize your approach to handle rapid add-clearing and sustained burst damage simultaneously. Follow these essential preparatory steps:
- Optimize Mobility and Survivability: Equip exotic armor that boosts aerial movement or provides on-demand healing. Navigating the external scaffolding requires precise jumps where a missed step means falling into the Martian abyss.
- Equip Precision Weapons: The arc nodes require single, accurate shots to activate quickly. Trace rifles or lightweight submachine guns are highly effective for sweeping across multiple nodes in rapid succession without reloading.
- Coordinate Boss Damage Types: The final encounters demand high-burst damage within very tight windows. Ensure your team aligns their damage buffs, utilizing tether mechanics, well of radiance, and heavy linear fusion rifles to maximize output before the invulnerability shields return.
Origins of the Seraph Facility
The facility was constructed during the Golden Age under the strict directives of the Bray family. Clovis Bray designed the Pillory bunker system as a failsafe, a hidden black site intended to monitor and, if necessary, imprison rogue artificial intelligences. The architecture blends brutalist industrial design with cutting-edge Seraph technology, characterized by towering spires, intricate wiring systems, and massive containment doors. This specific bunker was tasked with housing Soteria, an augmentative submind designed for interstellar colonization efforts. The historical significance of this site cannot be overstated; it holds secrets to humanity’s early attempts at predicting the future and navigating the deep cosmos.
Evolution of the Vex Incursion
Centuries after the Collapse, the Sol Divisive—a radical sect of the Vex known for their worship of dark artifacts—discovered the facility. Their incursion was not a simple smash-and-grab. The Vex recognized the immense processing power of the Pillory systems and sought to assimilate the warmind tech into their own network. They flooded the facility with radiolaria, retrofitting the Golden Age security protocols with their own defensive shielding. The evolution of this battlefield saw humanity’s mechanical guardians replaced by relentless Harpies, Minotaurs, and Hydras, turning a dormant scientific outpost into a heavily fortified stronghold that actively resists organic intrusion.
Modern State of the Spire
Today, the Spire of the Watcher stands as a heavily contested war zone. Red sand whips through the shattered glass of the upper observation decks, while deep below, the hum of volatile energy reactors threatens catastrophic meltdowns. The modern state of the facility requires immediate intervention to prevent the Vex from fully rewriting Soteria’s underlying code. Fireteams must bypass the heavily modified security grids, clean out the localized Vex infestations, and physically reboot the core systems. The environment is actively hostile, blending environmental hazards like bottomless pits and electric fields with relentless enemy combatant spawns.
Arc Node Pathway Architecture
The entire facility is interconnected via the Arc Node Pathway Architecture. This system was designed as a manual override for the automated blast doors. To manipulate it, combatants must acquire the Arctrician buff by eliminating specifically marked Vex targets. Once buffed, shooting a starting node activates a current that travels along physical wires to subsequent nodes. The technical challenge is that nodes must be shot in the exact order of the circuit path. Shooting out of sequence immediately grounds the circuit, forcing you to restart from the last active checkpoint. The wires transition from yellow (unpowered) to a glowing blue when successfully activated.
Harpy and Minotaur Combat Metrics
Enemy units within the spire have been optimized for defensive holdouts. The Sol Divisive deploys Minotaurs armed with heavily reinforced void shielding as mobile key-holders. The Akelous Harpy variant utilizes a unique modular shielding metric; its central processing core is protected by heavily armored fins that must be systematically destroyed to expose the vulnerable eye. Precision is mandatory. To understand the underlying technical facts of this engagement, note the following:
- The Arctrician buff lasts exactly 30 seconds but can be refreshed by shooting active nodes or defeating another Minotaur.
- Wire pathways frequently wrap around blind corners, requiring advanced spatial memorization and rapid repositioning.
- The final boss, Persys, features an impenetrable shield matrix that can only be shattered by triggering a localized reactor meltdown via the node system.
- Akelous possesses a rapid-retreat algorithm during its damage phase, forcing players to pursue it across the platform to maintain effective damage drop-off ranges.
Step 1: Navigating the Opening Descent
Your operation begins in the dusty canyons of Mars. Push forward through the initial Vex patrols until you locate the main entrance. You will encounter your first conduit Minotaur here. Defeat it, grab the buff, and quickly map the localized wire circuits connecting the entrance generators. Activate the nodes in sequence to blast open the main reinforced hatch, initiating your descent into the dark, subterranean levels of the bunker.
Step 2: Activating the Reactor Power Grid
Once inside, you will face a massive cylindrical room filled with multiple overlapping circuits. This is a pure speed and memorization test. Split your team into sectors. Have one person manage the endless waves of Goblins while the others trace the wires up the massive columns. Communication is key, as the final nodes for each circuit converge at the top of the room. Powering all circuits activates the central elevator mechanism.
Step 3: Platforming Through the Ares Spire
Taking the elevator up transitions you to the exterior of the tower. This jumping puzzle requires careful navigation of the scaffolding, hanging solar panels, and narrow girders. Use the external electrical nodes to activate extended bridges and open ventilation shafts. Keep an eye out for hidden alcoves that contain secret audio logs detailing Clovis Bray’s harsh methodologies.
Step 4: Confronting Akelous, the Siren’s Current
You emerge on a massive, cross-shaped platform suspended high above the Martian surface. Akelous patrols the center. To strip its shields, you must trace four separate wire paths starting from the center out to the very edge of the four respective arms. Avoid the Harpy’s explosive bombardments while running these circuits. Once all four fuel rods are activated, converge at the final node to trigger the damage phase.
Step 5: Mastering the Harpy DPS Phase
When Akelous approaches the activated platform arm, its physical fins will expose red, glowing weak points. You must destroy all of these weak points as quickly as possible. Once shattered, the central eye opens, and the boss slowly retreats backward toward the center. Unleash linear fusion rifles, sniper rounds, and tracking rockets, walking forward to keep your weapons within their optimal damage range before the shield resets.
Step 6: Descending into the Pillory Core
After destroying Akelous, grab your loot and drop down the central chute. You must navigate a heavily trapped descent, avoiding laser grids and rotating electrical barriers. Time your falls carefully and use your double jumps to arrest your momentum before hitting the bottom. This dark, claustrophobic transit tube leads directly into the final confrontation room.
Step 7: Defeating Persys, Primordial Ruin
The final room is split into two halves: the reactor core and the safety zone. Persys will aggressively hunt you with overwhelming firepower. You must power the side nodes to open the core doors, lure Persys inside, and then rapidly close the doors by completing the central node circuit from the outside. Once the doors seal, the reactor purges, stripping Persys of its invincibility. When the doors reopen, you have a brief window to deal massive damage before the cycle repeats.
Myths & Reality
Myth: You need a full, perfectly coordinated fireteam to complete the mechanics.
Reality: The mechanics are entirely predictable and lack complex wipe-timers on the nodes. Solo players can complete the entire dungeon by memorizing the wire paths and moving efficiently.
Myth: Hierarchy of Needs exotic bow drops are guaranteed after 10 runs.
Reality: The exotic bow drop rate remains entirely random based on RNG. Completing specific triumphs can increase your drop percentage, but there is no guaranteed threshold.
Myth: Arc nodes must be shot with Arc-elemental weapons.
Reality: Any weapon can trigger an arc node as long as you hold the Arctrician buff. Kinetic submachine guns and rapid-fire sidearms are highly recommended for their snappy handling.
Myth: Persys can be damaged during the reactor purge phase while the doors are closed.
Reality: Ammunition spent shooting at the closed doors or through the glass is completely wasted. Wait for the doors to fully open and the boss to step out before unleashing heavy ordnance.
Frequently Asked Questions
What is the recommended approach for the final boss?
Maintain high mobility to avoid Persys’s lethal melee slams. Always clear out the explosive Supplicants before attempting to run a node circuit, as they can instantly ruin a run if they explode near you.
Can you farm the encounters for loot?
Yes, when the dungeon is featured in the weekly rotation, you can repeat encounters continuously to farm for specific weapon rolls and armor pieces without being locked out.
How do you get the exotic bow?
The Hierarchy of Needs exotic bow has a small chance to drop exclusively from the final chest after defeating Persys. You have one chance per character, per week, unless it is the featured weekly dungeon.
Is the cowboy hat a guaranteed drop?
No. The highly sought-after Tex Mechanica cowboy hats (Class Item for Hunters, Helmet for Titans and Warlocks) are random drops from specific encounter chests and rely entirely on RNG.
What is the best weapon for Akelous?
Linear fusion rifles and high-impact sniper rifles perform exceptionally well because the damage phase requires precision hits on a moving target that slowly drifts away from the fireteam.
Does the Arctrician buff stack?
No, the buff does not stack in intensity. Acquiring it again simply refreshes the 30-second timer, giving you more time to complete your circuit routing.
How long does a typical run take?
A well-coordinated fireteam familiar with the node locations can clear the entire facility in roughly 25 to 35 minutes. Solo or learning runs will take significantly longer.
Taming the Spire of the Watcher is a thrilling test of speed, memory, and combat efficiency. Equip your best precision weapons, rally your fireteam, and plunge into the depths of Mars to claim the legendary golden-age arsenal waiting for you.



Leave a Reply