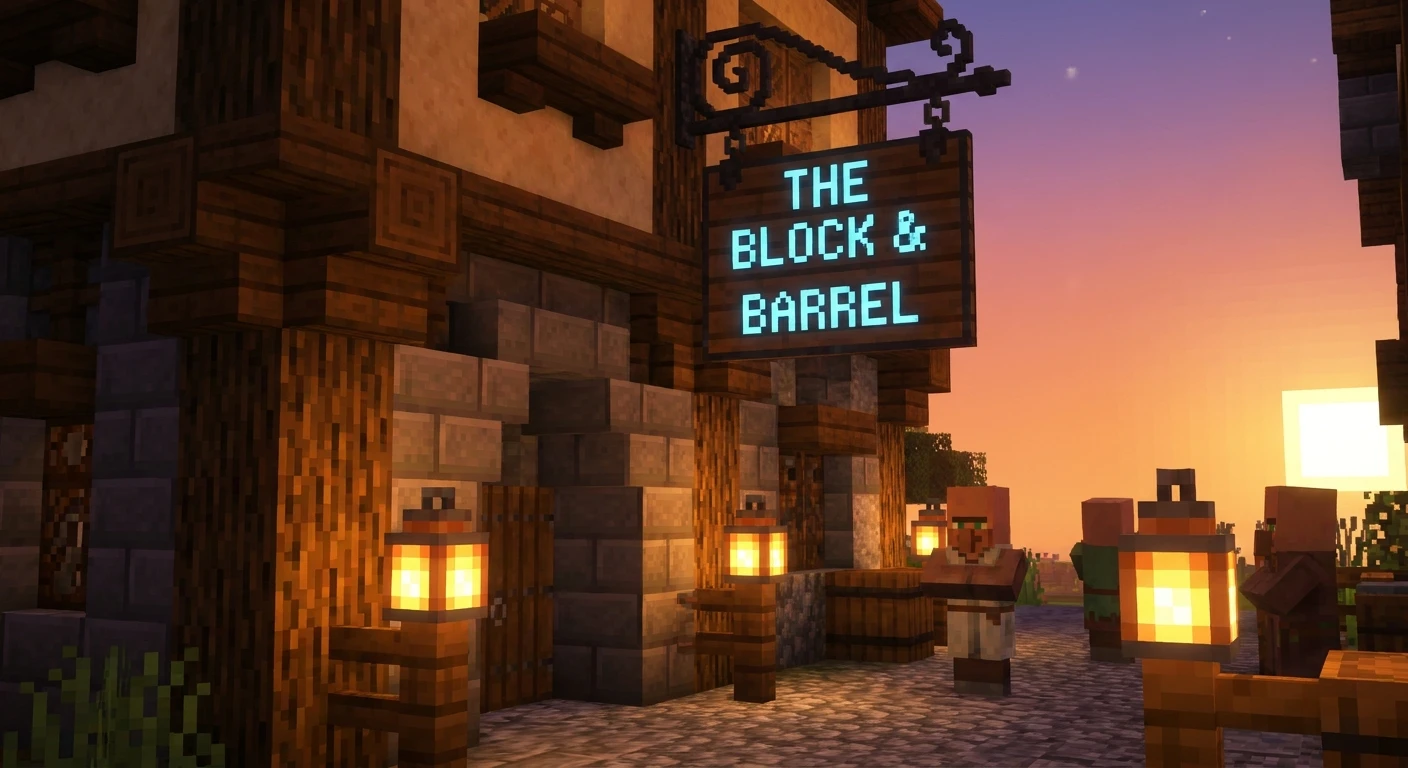
Mastering the Hanging Sign Minecraft Feature
If you want to add that extra layer of immersive detail to your custom builds, mastering the hanging sign Minecraft feature is exactly what you need. For years, structural builders and casual players alike relied on awkward architectural tricks to label their bustling player shops, cozy taverns, and massive storage rooms. The introduction of these suspended wooden placards completely changed the landscaping game. You no longer have to awkwardly stick a regular wooden sign onto a fence post and pretend it looks like a natural, swinging tavern board. With this specific block, your medieval villages, bustling city streets, and highly organized storage facilities get an immediate, massive aesthetic upgrade. We are going to walk through exactly how to source the materials, execute the crafting recipes, and utilize the unique placement mechanics that make these signs behave differently from their traditional counterparts. Because these blocks render text on both the front and the back independently, you open up a whole new world of multi-directional pathways and readable street corners. Grab your favorite axe, gather your iron chains, and let us dig into the definitive mechanics of one of the best decorative blocks ever added to the sandbox.
Why Upgrading Your Signage Matters
The core benefit of utilizing these suspended blocks lies in their versatility and spatial economy. Unlike traditional signs that require a solid block behind them or a full floor space below them, these can dangle freely from ceilings, fences, and iron bars. This frees up crucial walking space in tight corridors and adds vertical depth to flat ceilings.
Read also: Guide: How to Get Maple Syrup Stardew Valley; How to Get Parrot Off Shoulder Minecraft: Fast Guide.
- Value Proposition 1: The Medieval Tavern Vibe. Placing a dark oak variant outside a brick building immediately signals to players that they are entering a tavern or an inn. It creates atmospheric, location-based storytelling without needing bulky block art.
- Value Proposition 2: Directional Street Names. Because you can write independently on both sides of the block, hanging them from streetlamps allows players walking from opposite directions to read different neighborhood names.
| Wood Variant | Required Stripped Material | Visual Aesthetic |
|---|---|---|
| Oak & Birch | Stripped Oak / Birch Logs | Light, clean, modern village style |
| Dark Oak & Spruce | Stripped Dark Oak / Spruce Logs | Rustic, medieval, deep brown tones |
| Crimson & Warped | Stripped Crimson / Warped Stems | Otherworldly, fire-resistant, vibrant |
To successfully manufacture these blocks, you must follow a very specific set of instructions. Ensure your inventory is prepared before heading to your crafting station.
- First, locate your desired tree type and use any axe to right-click the logs, stripping the bark off entirely to create stripped logs.
- Second, craft or scavenge iron chains by combining one iron ingot with two iron nuggets in your crafting grid.
- Third, place two chains in the top corners of the crafting grid and fill the middle and bottom rows with six stripped logs to yield six hanging signs.
Origins of the Suspended Block Idea
The journey to getting proper suspended signage into the vanilla game was a long and heavily requested process. For nearly a decade, the player community begged the developers for a way to create authentic storefronts. Players would build massive, oversized banners or use custom command block floating text to simulate the effect of a shop marker. The community even created countless mods specifically dedicated to adding aesthetic suspension boards, proving that the demand for architectural detail was overwhelmingly high.
Evolution Through the Snapshots
When the 1.20 Trails & Tales update was first announced, the immediate standout for the building community was the hanging sign. During the snapshot testing phases, players heavily scrutinized the textures, the chain colors, and how the text rendered. Initially, the community had to test how these blocks interacted with various transparent and non-solid blocks. Developers tweaked the hitboxes and the visual chain connections. If you attach the block to a wide surface, you get two parallel vertical chains. If you attach it to a narrow pole like a fence, the chains form a V-shape, demonstrating the developers’ commitment to dynamic visual block states.
The Modern State in the Game
Today, these blocks are a fundamental staple in multiplayer servers and single-player survival worlds alike. With the expansion of the wood palette, including the bright pink of cherry wood and the unique textures of bamboo, builders have an unprecedented level of color coordination. You can mix and match the wood type with various text dyes to create high-contrast, beautiful markers. The addition of editing mechanics, where you can simply right-click an already placed sign to rewrite the text without breaking it, cemented this item as one of the most user-friendly decorative pieces currently available.
Hitboxes and Dynamic Block States
From a technical standpoint, these are not considered full solid blocks. They possess unique properties that separate them from standard building materials. They have a selection box that allows you to target and click them, but they completely lack a player collision hitbox. This means you cannot use them to build parkour staircases, as your character will fall directly through the wooden texture. Furthermore, they feature dynamic block states based on the surface they are anchored to. The game actively checks the block tag of the supporting structure above or beside it to determine which 3D model to render.
Text Rendering and NBT Data
The way the game handles the text data on these blocks is fascinating. Unlike older iterations of signage that stored a single string of data, these utilize advanced NBT (Named Binary Tag) data fields. Specifically, the block entity contains separate arrays for the front and back faces, allowing entirely independent text strings, glowing states, and dye colors on either side of the exact same wooden board.
- Mining Speed: They break almost instantly when hit with any tier of axe, though they can be mined slowly by hand.
- Flammability Rules: Standard wood variants will catch fire and burn away if placed near lava or open flames, but Crimson and Warped variants are strictly fireproof.
- Waterlogging: You can waterlog these blocks by placing them in water or using a water bucket on them, which prevents them from being destroyed by flowing currents.
- Blast Resistance: They feature extremely low blast resistance and will be easily obliterated by a nearby Creeper or TNT explosion.
Step 1: Gathering Iron for the Chains
Before you even think about chopping down trees, you need to secure a solid supply of iron. Head down into the caves and mine iron ore, then smelt it in a furnace to get iron ingots. You will need to break some of these ingots down into iron nuggets. Crafting chains requires one iron ingot flanked vertically by two iron nuggets. Since you need two chains per crafting batch, ensure you have plenty of iron in your storage.
Step 2: Selecting and Harvesting Your Wood
The visual impact of your text depends heavily on the background wood. Head to a forest and chop down your preferred trees. Remember that you cannot use regular logs for this recipe. You must use your axe to right-click the logs while they are placed in the world, or right-click them in your inventory to strip the bark. You need exactly six stripped logs for one crafting operation.
Step 3: The Crafting Process
Open your crafting table interface. Place your two iron chains in the top left and top right slots. Then, take your six stripped logs and fill the entire middle row and the entire bottom row. This exact configuration will yield a batch of six signs. It is a highly efficient recipe compared to older decorative items.
Step 4: Choosing the Placement Anchor
Where you place the block determines its visual chain style. If you look up and click the bottom of a full solid block like a stone brick, the chains will drop straight down. If you click the bottom of a fence post, iron bar, or glass pane, the chains will dynamically angle inward into a V-shape. If you click the side of a block, a horizontal wooden bracket will automatically generate to support the chains.
Step 5: Drafting and Formatting the Text
Once placed, the text interface will immediately pop up. You can type up to four lines of text on the front side. Once you finish the front, walk around to the back side, right-click the wood, and you can write an entirely different message on the reverse face. Take your time formatting the spaces to center your words perfectly.
Step 6: Applying Dyes for Contrast
Raw text on dark wood like Dark Oak or Spruce can be incredibly difficult to read from a distance. To fix this, harvest flowers, crush them into colored dye, and right-click the placed board with the dye in your hand. White dye, yellow dye, and light blue dye offer incredible contrast against darker woods, making your street names readable even at night.
Step 7: The Glowing Finish
To achieve the ultimate storefront aesthetic, you must hunt down a Glow Squid. These creatures spawn in deep underground water lakes. Slay them to collect Glow Ink Sacs. Right-clicking your dyed text with a Glow Ink Sac will illuminate the letters, ignoring the game’s ambient lighting engine and making the text brightly visible even in pitch-black midnight environments.
Debunking Common Myths
Myth: You can craft these items using regular unstripped logs or standard wooden planks.
Reality: The crafting engine strictly requires stripped logs or stripped wood. If the bark is still on the block, or if you have already processed the wood into planks, the crafting table will not yield the item.
Myth: Hanging signs have physical collision and can be used to block mobs or build parkour maps.
Reality: They have absolutely no physical collision hitbox. Players, zombies, and arrows will pass directly through them, meaning they are purely decorative and cannot be used as structural barriers.
Myth: You have to place two separate items back-to-back to get text on both sides.
Reality: A single item features functional text rendering on both its front and back faces, allowing you to write two completely different messages on a single block.
Myth: Once you place the block and write the text, you have to break it and replace it to fix a typo.
Reality: Since recent updates, you can simply right-click an existing board with an empty hand to reopen the text editor without having to break the block.
Frequently Asked Questions
Can you hang them from slabs?
Yes, you can attach them underneath top-half or bottom-half slabs. The chain will visually connect directly to the bottom surface of the slab block perfectly.
Do they work with custom fonts and symbols?
Yes, any unicode symbol or custom font applied via a resource pack will render correctly on the wooden faces, just as it would on a standard text board.
Can zombies or villagers break them?
No, standard mobs completely ignore these decorative blocks. Zombies cannot break them down like they do with wooden doors.
Are they flammable?
Most wood variants are flammable and will burn if exposed to lava. However, if you craft them using Crimson or Warped stems from the Nether, they become completely fireproof.
How many items do you get per craft?
A single crafting recipe utilizing two chains and six stripped logs will give you exactly six items in return, making them fantastic for large-scale city projects.
Can you edit the text later?
Yes, by right-clicking them in modern game versions, you can edit the text, apply new dyes, or remove the glowing effect without destroying the item.
Do they break if the support block is mined?
Yes, because they require an anchor point, mining the block they are attached to will cause them to pop off and drop onto the floor as an item.
In conclusion, incorporating these blocks into your architectural toolkit will drastically improve the atmosphere of your survival or creative worlds. They solve a decade-old decorating problem while providing a beautiful, customizable canvas for navigation and storytelling. Stop relying on clunky fence posts and start stringing up proper storefront markers. Boot up your world, gather some iron and stripped logs, and start transforming your base’s aesthetics today!



Leave a Reply